How to Clean Baby Bottles the Right Way: A Step-by-Step Guide
Let's be real — nobody's favorite part of parenting is washing bottles at midnight. But keeping your baby's bottles properly cleaned and sanitized is one of the most important things you can do for their health. Here's everything you need to know, from the basics to the pro tips.
Why Bottle Cleaning Matters So Much
Milk residue is a breeding ground for bacteria. Whether you're using breast milk or formula, any leftover residue can harbor harmful germs within hours. Babies under 3 months (and preemies or immunocompromised infants) are especially vulnerable, so proper cleaning isn't optional — it's essential.
The Step-by-Step Cleaning Process
1. Rinse Immediately After Use
Don't let that bottle sit! As soon as your baby finishes feeding, give the bottle a quick rinse with warm water. This prevents milk from drying and caking on — which makes everything harder later.
2. Disassemble Everything
Take apart every single piece: bottle body, nipple, collar ring, base cap, and any valves or straws. Every component needs individual attention. This is where bottle design really matters — **the fewer parts, the easier the clean.**
3. Wash with Warm Soapy Water
Use a dedicated bottle brush and baby-safe dish soap. Scrub the inside of the bottle thoroughly, paying special attention to:
- The bottom corners where milk pools
- Thread areas on the collar and base
- The inside of the nipple (turn it inside out and scrub)
- Any grooves or measurement markings
4. Rinse Thoroughly
Make sure all soap residue is completely gone. Soap residue can upset your baby's tummy.
5. Sanitize (Especially for Newborns)
For babies under 3 months, sanitize after every wash. You have several options:
- **Boiling:** Submerge all parts in boiling water for 5 minutes
- **Steam sterilizer:** Follow manufacturer instructions (usually 5-8 minutes)
- **Microwave sterilizer bags:** Quick and convenient for travel
- **Cold water sterilization tablets:** Great for on-the-go
6. Air Dry on a Clean Rack
Place all parts on a dedicated clean drying rack. Avoid using towels — they can transfer germs. Let everything air dry completely before reassembling.
Why Bottle Design Makes Cleaning Easier (or Harder)
Here's something most parents don't think about until they're scrubbing their 50th bottle at 2 AM: **not all bottles are created equal when it comes to cleaning.**
Traditional bottles with lots of internal parts, anti-colic valve systems, and narrow necks are a nightmare to clean. You need special tiny brushes, and milk still gets trapped in hard-to-reach crevices.
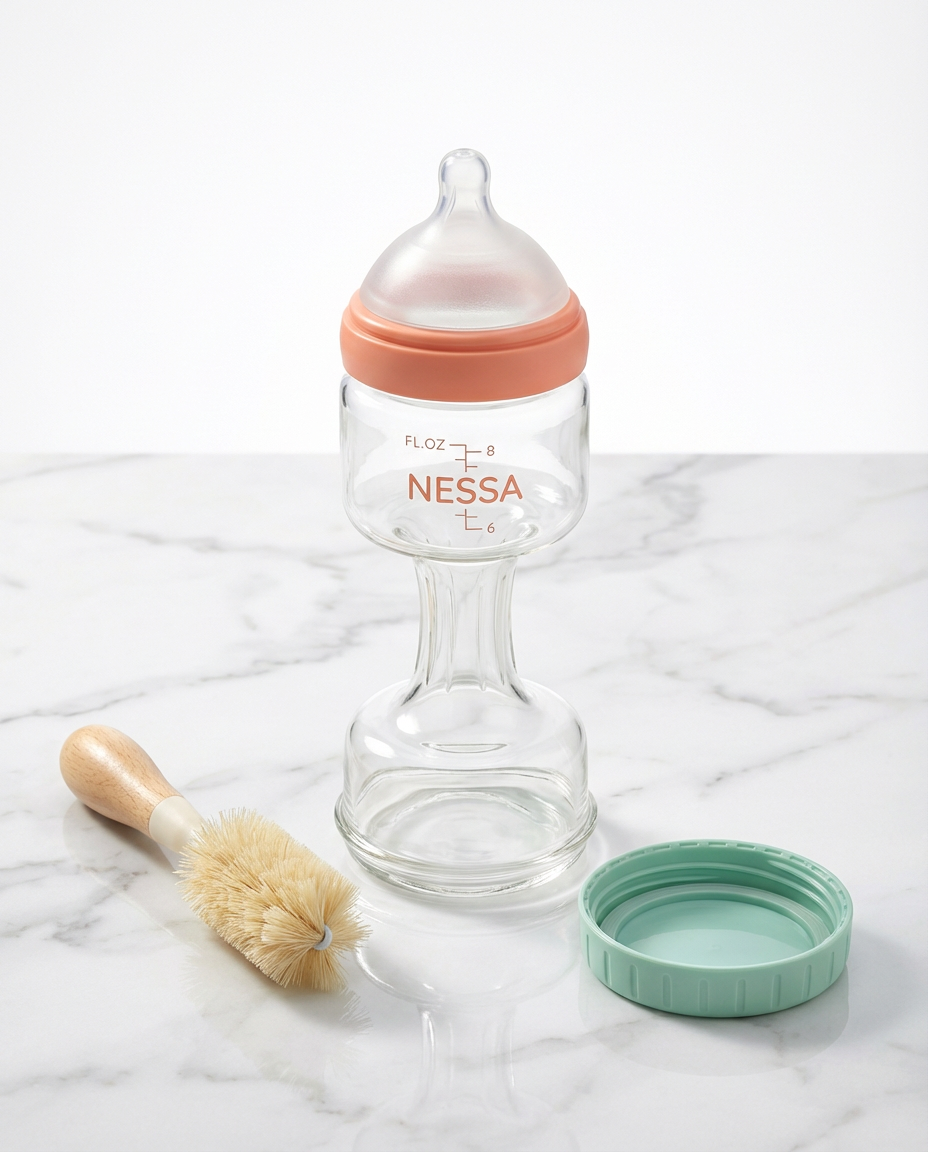
The Nessa Bottle Advantage
The Nessa Bottle was designed with easy cleaning in mind from day one:
- **Wide-mouth opening** — your hand or a standard bottle brush slides right in, no special tools needed
- **Removable base cap** — the bottom unscrews completely, giving you full access to clean the entire interior from both ends
- **Minimal parts** — just 4 components (body, nipple, collar ring, base cap). No tiny valves, no weighted straws, no hidden crevices
- **PPSU material** — naturally stain-resistant, doesn't absorb odors, and handles boiling water and steam sterilization without warping or discoloring
- **Smooth interior** — no internal tubes or mechanisms where old milk can hide
When you can unscrew the bottom and clean straight through, there's literally nowhere for bacteria to hide. That's peace of mind you can feel.
Pro Tips from Real Parents
**The "Sniff Test" isn't enough.** Even if a bottle smells clean, bacteria can still be present. Stick to the proper cleaning routine.
**Replace nipples regularly.** Even with perfect cleaning, nipple silicone degrades over time. Replace every 2-3 months or immediately if you notice any tears, discoloration, or stickiness.
**Use a dedicated sponge or brush.** Don't use the same sponge you use for your dishes — it can transfer food bacteria to baby's bottles.
**Hot water is your friend.** Always start and finish with hot water. It cuts through milk fat better than cold water.
**Deep clean weekly.** Even with daily washing, do a thorough sterilization once a week. Soak all parts in a mixture of hot water and white vinegar (1:1 ratio) for 15 minutes, then sterilize as usual.
When to Replace Your Bottles
PPSU bottles like the Nessa Bottle are incredibly durable, but nothing lasts forever:
- Replace if you notice any cracks, chips, or cloudiness
- Replace if the bottle develops a persistent odor even after deep cleaning
- Replace nipples every 2-3 months regardless of condition
- Bottle bodies typically last 6-12 months with daily use
The Bottom Line
Clean bottles = healthy baby. It's that simple. And choosing a bottle that's designed to be easy to clean — like one with a removable base and minimal parts — saves you time, stress, and worry every single day.
Because at 2 AM, the last thing you want to be doing is hunting for that tiny brush to clean a complicated anti-colic valve. Keep it simple, keep it clean, keep it Nessa. 🍼✨
Related Topics:
Love What You're Reading?
Join our waitlist to be the first to get your hands on Nessa's revolutionary dumbbell baby bottles!
Join the Waitlist